Wednesday, 19 September 2018

A Book Tutorial

Long time readers will know that as well as a bit of embroidery I also like to dabble with some book making. Over the summer I taught a one day class making these pretty little albums and afterwards I was asked if  I could produce an on line tutorial. I'd like to tell you I had made a wonderful video that you could follow step by step but I haven't! I have however spent hours analysing, photographing, drawing and writing the whole process out step by step to make a downloadable fully illustrated PDF that is now available to buy from my Etsy shop. I will say now that I didn't invent this book structure but I learned how to do it from a fabulous print maker and teacher called Heather Power. I don't know whether Heather invented it or whether she learned it from someone else, but it was part of a weekend bookmaking with Heather and I was never given any notes, so the tutorial is all my own work.


But before I possibly tempt you to buy yourself a copy, I thought I would do a free tutorial here for a simple variation of a pamphlet book, that is one of my favourite little books to make.


To make one of these little books, perfect for notes and quick sketches  you will need:
Sheets of cartridge paper for the pages - enough to make 4-8 sheets 10cm x 20 cm (4" x 8")
A piece of water colour paper or light card 10.5cm x 25cm (4.5" x 10")
Some decorative paper (optional)
A craft knife, a metal ruler, a tapestry (blunt) needle, strong thread, a glue stick, a map pin and an old tea towel


First of all tear your cartridge paper into the correct size for the pages. I do this against a metal ruler and prefer to tear rather than cut as it gives a deckled edge to the pages. It doesn't matter so much then if they don't quite line up.


Then fold each in half and make two nests of 2-4 pages, depending on the thickness of your paper. These 'nests' or groups of pages are called signatures.


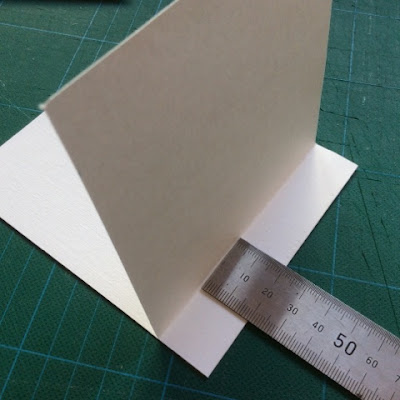
Now take your water colour paper or card for the cover and fold this in half too. Measure 2cm (1") in from the folded edge and fold the cover back on itself.


Do this on both sides so you end up with a W effect, as shown in the photo.


Now take your two signatures and put one into each fold of the W as shown.


You then want to fold the covers out flat whilst keeping the fold of the signatures tucked against the folds of the covers as shown...  this is the stage where I realised having a different colour cover might have been useful for the sake of the photos. But I'm not doing it again!


Hopefully the diagram will make it seem clearer (The shaded bit is the cover)


You are now going to stitch the two signatures and the cover together in one quick manoeuvre along the fold using a simple pamphlet stitch.


Along the fold mark three dots, one in the centre and two either side an equal distance apart from the centre. Using a map pin and with the whole thing resting on an old tea towel push holes where you have made the dots.


Thread a rounded needle with about 40cm (16") of strong thread and take it through the centre hole, leaving a tail of thread for tying off later. On the other side take the thread up and through the top hole.


Now take it straight back down to the bottom hole, missing the middle hole.


And finally back through the middle hole coming out on the other side of  the long stitch that runs down the centre.


You should have two ends either side of the central long stitch, which you can now tie off and trim.


The diagram shows the order of stitching... in the centre, down to one end, back to the other end and then back out the centre.


All you need to do now is fold your covers back to the outside and you should have a neat little two signature pamphlet book!


I then decorated the cover with nine little squares of wrapping paper. You may have noticed the first book had little squares from the inside of envelopes. But of course you can decorate it any way you like or use coloured or patterned card for the cover. If you make one I'd love to see how it turns out!


And should you wish to make a slightly more complicated book the twenty page fully illustrated tutorial is available from my etsy shop here. And thank you to Catriona for testing this for me. Her response was "Very clear instructions... the pattern is a winner" so I hope that might encourage you to give it a try.


And something I forgot to mention the other day... I will be making one of these books for every single person who comes along on my block printing India trip with me next year. A little gift from me to say thank you and to hopefully inspire some sketches while we are there!

Sunday, 16 September 2018

The Story of a Bun

In all the years I've lived in the Cambridge area until recently I had never eaten a legendary Fitzbillie's Chelsea Bun. These sticky fruit buns were created and first eaten at The Bun House in Chelsea in the eighteenth century but they have become synonymous with Fitzbillies restaurant in Cambridge. So in the interest of crossing another sixty by sixty off my list I thought it was about time I tried one.


Maybe it was because I kept hearing how amazing they are but on trying the real thing I was actually just a little bit disappointed.  Now don't get me wrong, it was good, but not as good as I thought they would be. They were just a bit too dry despite the sticky topping (I wondered as it was a Sunday if they were possibly a day old?) and there wasn't enough spicy flavour for my taste.

So given that on the Great British Bake Off last week (despite my growing disappointment with the show I can't resist watching) the contestants were asked to make Chelsea buns I couldn't resist the challenge.


I brought out my trusty mixer to knead up some dough and decided to go with an almond and cherry theme, soaking dried and glace cherries in some Cointreau with a few drops of almond essence. I would have preferred Amaretto for extra almond flavour but I didn't have any!


When the dough had risen it was knocked back and rolled out before spreading it with melted butter, a mix of ground almonds and sugar as well as the drained fruit.


It then was rolled up like a Swiss roll and then allowed to rise again.


The recipe that I was using as a guide suggested making a sticky glaze that was added just before baking but I think I would add a glaze after the buns are cooked if I made them again. I also think I would find a bigger tin because my buns were starting to make a bid for freedom!


But despite being rather misshapen and a little too crisp on top, they were very soft and pillowy inside with a good almond and cherry flavour. Definitely worth making again to perfect the recipe!


And although it feels like sacrilege to say so.. I preferred them to the Fitzbillies buns!

Only two more 60 x 60 things to go before I start my 100 challenge!

Wednesday, 12 September 2018

My Big News

I can finally reveal my big and very exciting news... and you are hearing it here first... that I have been invited by Colouricious Holidays to host a block printing holiday to India next year


For ten days from 17th to 27th September 2019 we will be based in the beautiful pink city of Jaipur staying in a private family run hotel - the Megh Niwas. Our breakfasts and dinners will be prepared daily by their own chef using home grown organic food.


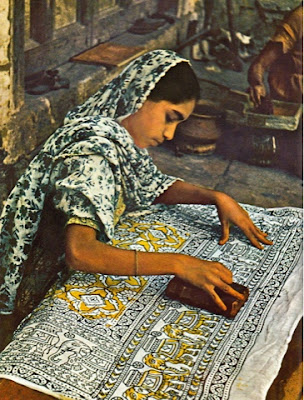
We will be taking part in several traditional block printing workshops in Jaipur supporting local artisans and craftsmen.


We will spend a day with elephants


and will visit local sights of historic interest and great beauty such as the magnificent Amer Fort, built high on a hillside from red sandstone and marble, overlooking Maota Lake


and Hawa Mahal, another stunning pink and red sandstone palace with over 900 small windows, originally used so that royal ladies could watch festivites without being seen. All transport will be in our own private coach.


There will also be time to visit markets, go shopping and experience local life.

I have always wanted to visit India so I can't tell you how excited I am about this trip. And all I have to do is tell you all about it and hopefully get enough people to fill up the tour... although places are limited. Flights are arranged from London Heathrow and are all inclusive in the price but you can join the trip from anywhere in the world if you wish to make your own transport arrangements and the price will be adjusted accordingly.

All the information you need can be found here:
but don't hesitate to get in touch with me if you have any questions.

Did I tell how excited I am?

Monday, 10 September 2018

The Final Celebration

It couldn't have been better weather or a more perfect setting for our final wedding celebration in this summer of weddings!

 
At the Royal Tay Yacht Club on the bank of the River Tay in Dundee in the most glorious warm sunshine we gathered for a blessing of Kirsty and Adrian's marriage. I think it was the first time I've ever been out without a coat and scarf, never mind a cardigan, on a visit to Scotland!


The very happy couple arrived hand in hand for a short service to celebrate their week long marriage. It was lovely occasion for Scottish relatives and friends to share their special day.


Although this week a certain little someone decided to get in on the action...


And almost, but not quite, stole the show... peepo!


After drinks on the terrace we had yet another delicious meal, although I ended up sharing mine with this little chap, who once again was giggling and happy all evening until he finally flaked out in his push chair.


The meal was followed by some lively dancing to a ceilidh band (lots of men in kilts!) but it was also a chance to catch up with family members - Stewart with his Mum and Dad and sister in particular.


And of course there was cake... a rather well travelled cake having come 430 miles in the boot of our car the previous day, but it seemed to survive. So another perfect day and a very happy Kirsty and Adrian.


We were back home again on Sunday after another 9+ hours on the road and now I need to get back to some sort of normality, whatever that may be! It really has been the most wonderful summer although I seem to be suffering from post wedding exhaustion... three weddings and five celebrations in the space of eight weeks have left me feeling just a little tired but perhaps I shouldn't be surprised when I think of all the travelling, baking, sewing and entertaining it has involved.

Now if you'll excuse me I'm going for a lie down but I'll be back in a day or two with my exciting news.

Wednesday, 5 September 2018

Bake Off Blues...or Greens

So picture the scene - 
The day before wedding number three, I have just finished making a dress, I've cleaned bedrooms and made up spare beds for our six guests arriving that afternoon (well eight guests actually but over three nights, two went, were replaced by two others, and then the original two came back again) I have made four large salads for a post wedding rehearsal buffet, I have shopped and filled the house with food and I have finished making a wedding cake.

I know you have already seen the wedding cake but I loved this shot by one of Kirsty's friends so thought I'd sneak it in!

Photo credit: Claire Tyne

So with an hour to spare while Stewart went to the airport to collect his sister and niece I thought I would try the technical challenge from last week's Great British Bake Off... yes, homemade Wagon Wheels. I don't know what possessed me either!


The biscuit base was easy and even making marshmallow wasn't too bad despite never having done it before. Although just for the record I probably won't do it again. Homemade marshmallow is infinitely superior to the shop bought variety but after three or four they have the same effect of making you feel sick. Just don't ask how I know. But I digress. I opted for shop bought jam under the circumstances (I know, slacking!) and then it came to coating the biscuits in chocolate and putting them all together.


You have probably never seen so much mess in your life. Everything, and I do mean everything, was coated in chocolate... and all this was done at 10.30 pm, after the rehearsal supper, the night before the wedding. Because of course, the whole process took far longer than the hour or so Stewart was away to the airport!

And the verdict... well they all went and everyone seemed to like them except me. I'd forgotten that one of my pet hates is fruit jam with chocolate. I took one bite and almost spat it out. I thought they were revolting and won't be making them again!


If you have seen last night's show you will know that the technical challenge was a sponge cake with pistachio marzipan and fondant icing coloured with... spinach! Which frankly sounds ridiculous and looked far too heavy and sickly for my taste so I won't be making that. Instead I will show you my version of a green cake from a recipe by the amazing Jin, master of Eastern flavours and wonderful cakes, which was flavoured with pandan (not made this week I might add but a couple of years ago!)


Only brought to mind because one of the contestants used pandan last night for her signature bake and Paul Hollywood turned his nose up to it and Noel Fielding likened it to pond weed which seemed rather unfair given it has a delicate flavour reminiscent of the fragrance of basmati rice crossed with coconut. 

Two shows into the new series and I think it is starting to look a bit past it. The challenges are becoming more and more ridiculous (they are meant to be amateur bakers for heaven's sake) and the presenters more and more irritating. The corny jokes are painful... or is it just me? What do you think?

Sunday, 2 September 2018

Wedding Number Three

And so we came to the third family wedding of the summer when my beautiful step-daughter Kirsty got married. In the space of two months we have travelled from Greece to Cambridge and Cambridge again for two very different and unique weddings and now we were at the local church for a wonderful traditional wedding with a bride resplendent in a beautiful beaded dress and veil. There were also many handsome men in kilts!


Her Dad was quite rightly very proud indeed.


The sun shone and the day was as perfect as Kirsty and Adrian had planned.


Our grandson Logan thoroughly enjoyed himself and was happy all day long.


The bridesmaids... and the flowers were beautiful.


Even if Logan decided to pull his Daddy's flower off to add to his Mummy's bouquet!


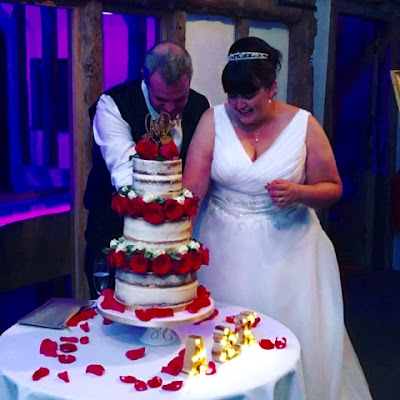
The cake, even if I say so myself, turned out well and possibly even exceeded my expectations. Three separate layers, a traditional Victoria sponge, a lemon drizzle and a gin and tonic cake built into a towering construction with layers of roses in between.


And I even finished my dress in time too...


Which more by luck than judgement fitted really well.


So there we are, three weddings, each completely different but each absolutely wonderful in their own unique way. Fabulous happy days to remember... although it's not quite over yet. Next weekend we are heading up to Dundee for a ceremony and a blessing in repeat of this weekend's celebrations  for family in Scotland who couldn't make it down south. More dancing, drinking and men in kilts await us I believe!

With three weddings and five different celebrations this is not a summer we are going to forget in a hurry. I'm worried it's going to seem a bit quiet in the coming months.