Showing posts with label recipes. Show all posts

Friday, 16 August 2019

Meat Free Friday

One of the major changes we can make as individuals to reduce our carbon footprint is to reduce our meat intake and change to a more plant based diet. There is plenty of information available  as to why this is  not only essential for reducing greenhouse gases but also if we are to continue to feed the ever growing world population. 
You can read articles here and here if you want to find out more.
In particular the biggest culprits are beef and lamb, because of the way they graze and the additional methane they produce. Obviously it follows that if we are reducing our beef consumption then we should also reduce our dairy intake, although dairy farming is not quite so intensive as raising cattle for beef.

I am aware that drastically changing your diet if you have always eaten meat is not easy so as someone who has eaten a largely vegetarian and pescatarian diet for the past 25 years I thought I would share some of my favourite veggie meals in regular "Meat Free Friday" posts.

One of my favourite books for simple, easy to make but really tasty vegetarian dishes is The River Cottage Veg everyday book. I think I especially like it as it is not intended as a vegetarian cookbook but as a book to encourage us all to eat more vegetables. It's not in the least bit preachy but just full of amazing food that you really want to eat
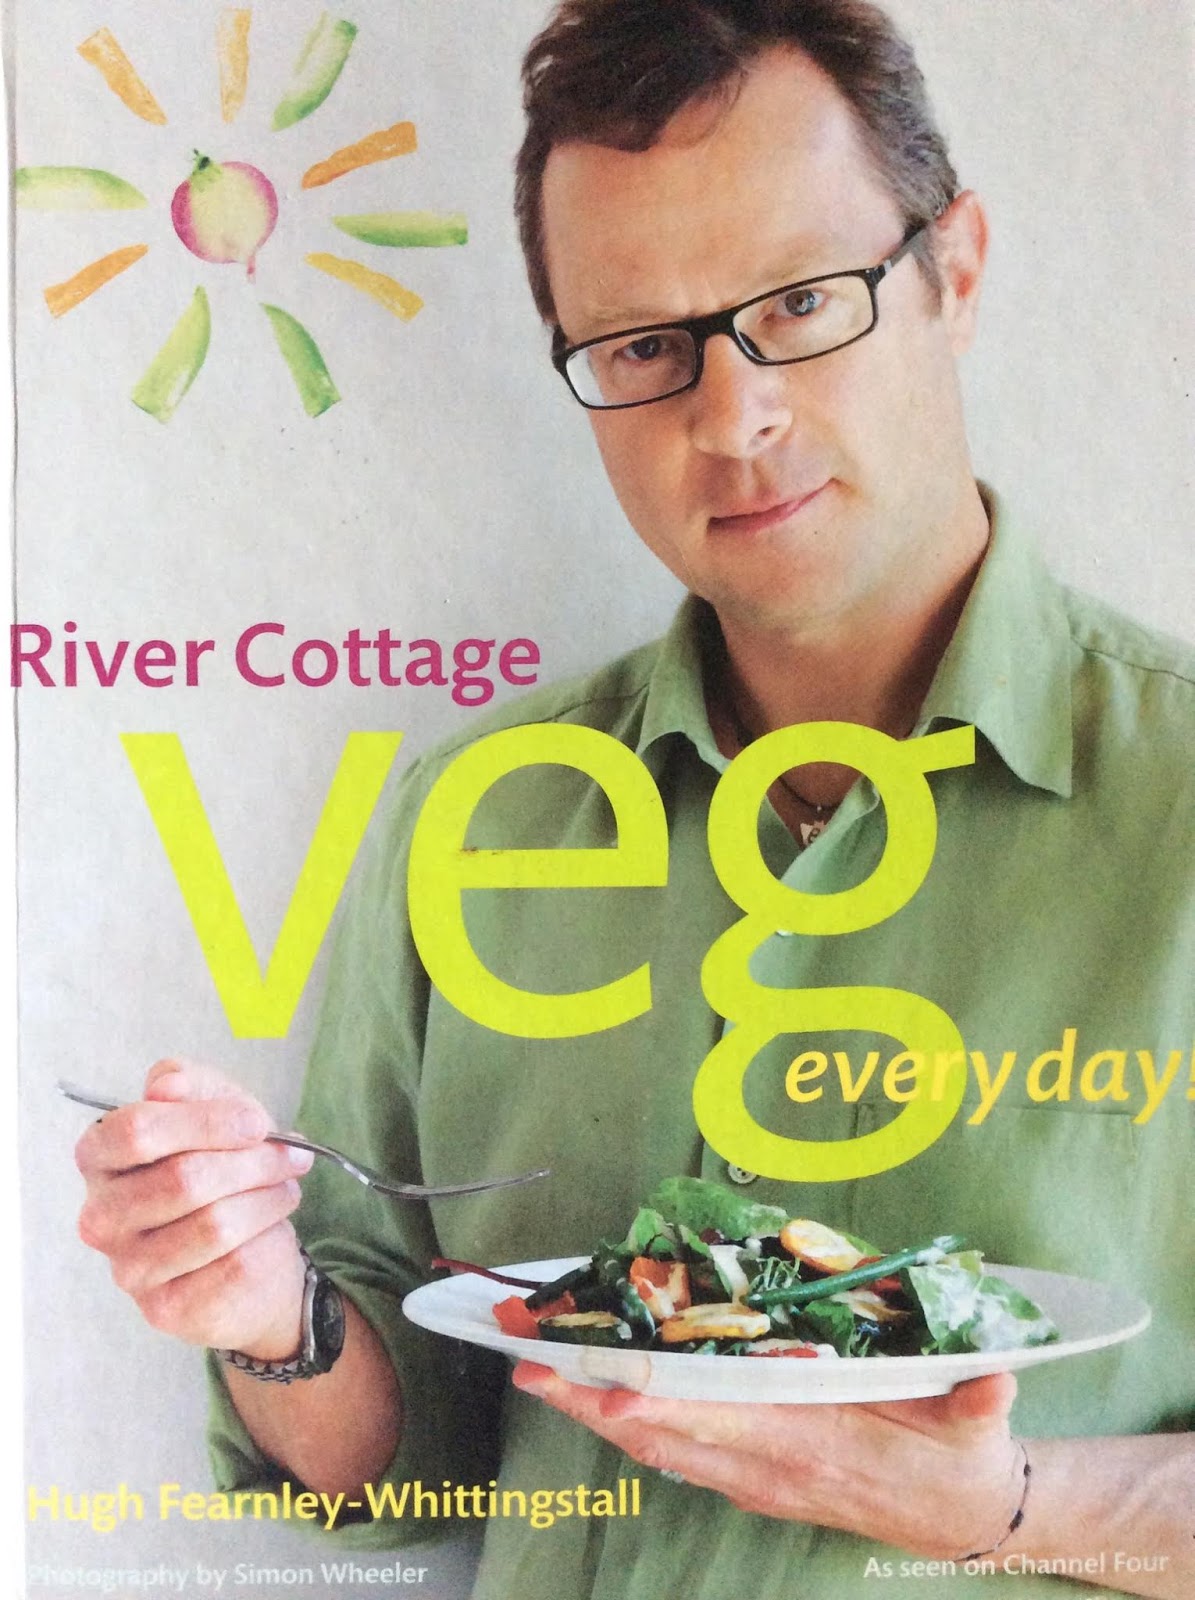

For anyone who grows their own veg getting a glut of courgettes at this time of year is a bit of a given and over the years I have become somewhat of an expert at creating courgette based meals. I could feed you for a week on courgettes without ever repeating a single dish! So one of my favourite recipes from the book is a Greek inspired Courgette and Rice filo pie. You can tell it's a favourite by the amount of splatters on the page!

Admittedly it does involve using filo pastry which can be a bit of a faff but it's really not that difficult and putting the filling together takes just a couple of minutes.  If using filo is a step too far you could always replace it with a couple of sheets of ready rolled puff pastry. My Greek daughter-in-law makes a fabulous Tyropita (cheese pie) using puff pastry

You can find the recipe by clicking on the link here: Courgette and Rice Filo Pie.

I made it this week but didn't have fresh dill. Well, I thought I had fresh dill but when I took it out to use it had gone slimy in the packet (well before it's sell by date)... all the more reason to ditch the plastic and find sources other than the supermarket. I think my new garden needs a herb patch. But I did have some chives so used those instead and it tasted just as good as ever.

It makes a delicious pie that feeds four generously. It is excellent hot as the centre of a main meal and I particularly like it with some steamed carrots on the side. But it is equally good cold with a salad or part of a picnic. Because the rice magically cooks by absorbing all the  liquid from the courgettes it stays lovely and crisp too... No soggy bottom!


Let me know if you give it a try or you have any tips of your own for reducing your meat consumption. Even if everyone started by replacing just one meal a week or maybe had one meat free day per week it could begin to make a difference. And the added benefit is that a plant based diet is better for your health too. Meat Free Friday anyone?

Sunday, 23 June 2019

A Blueberry Lemon Ricotta Cake...

And some good news!
Shall we get the news out of the way first?
We have finally exchanged contracts and in a little over weeks time we will be in our new home. I had got to a stage where I never believed it was going to happen so I’m definitely wearing my happy pants this week. Smiles all round are the order of the day! And maybe even a cake to celebrate.


So now for that cake.
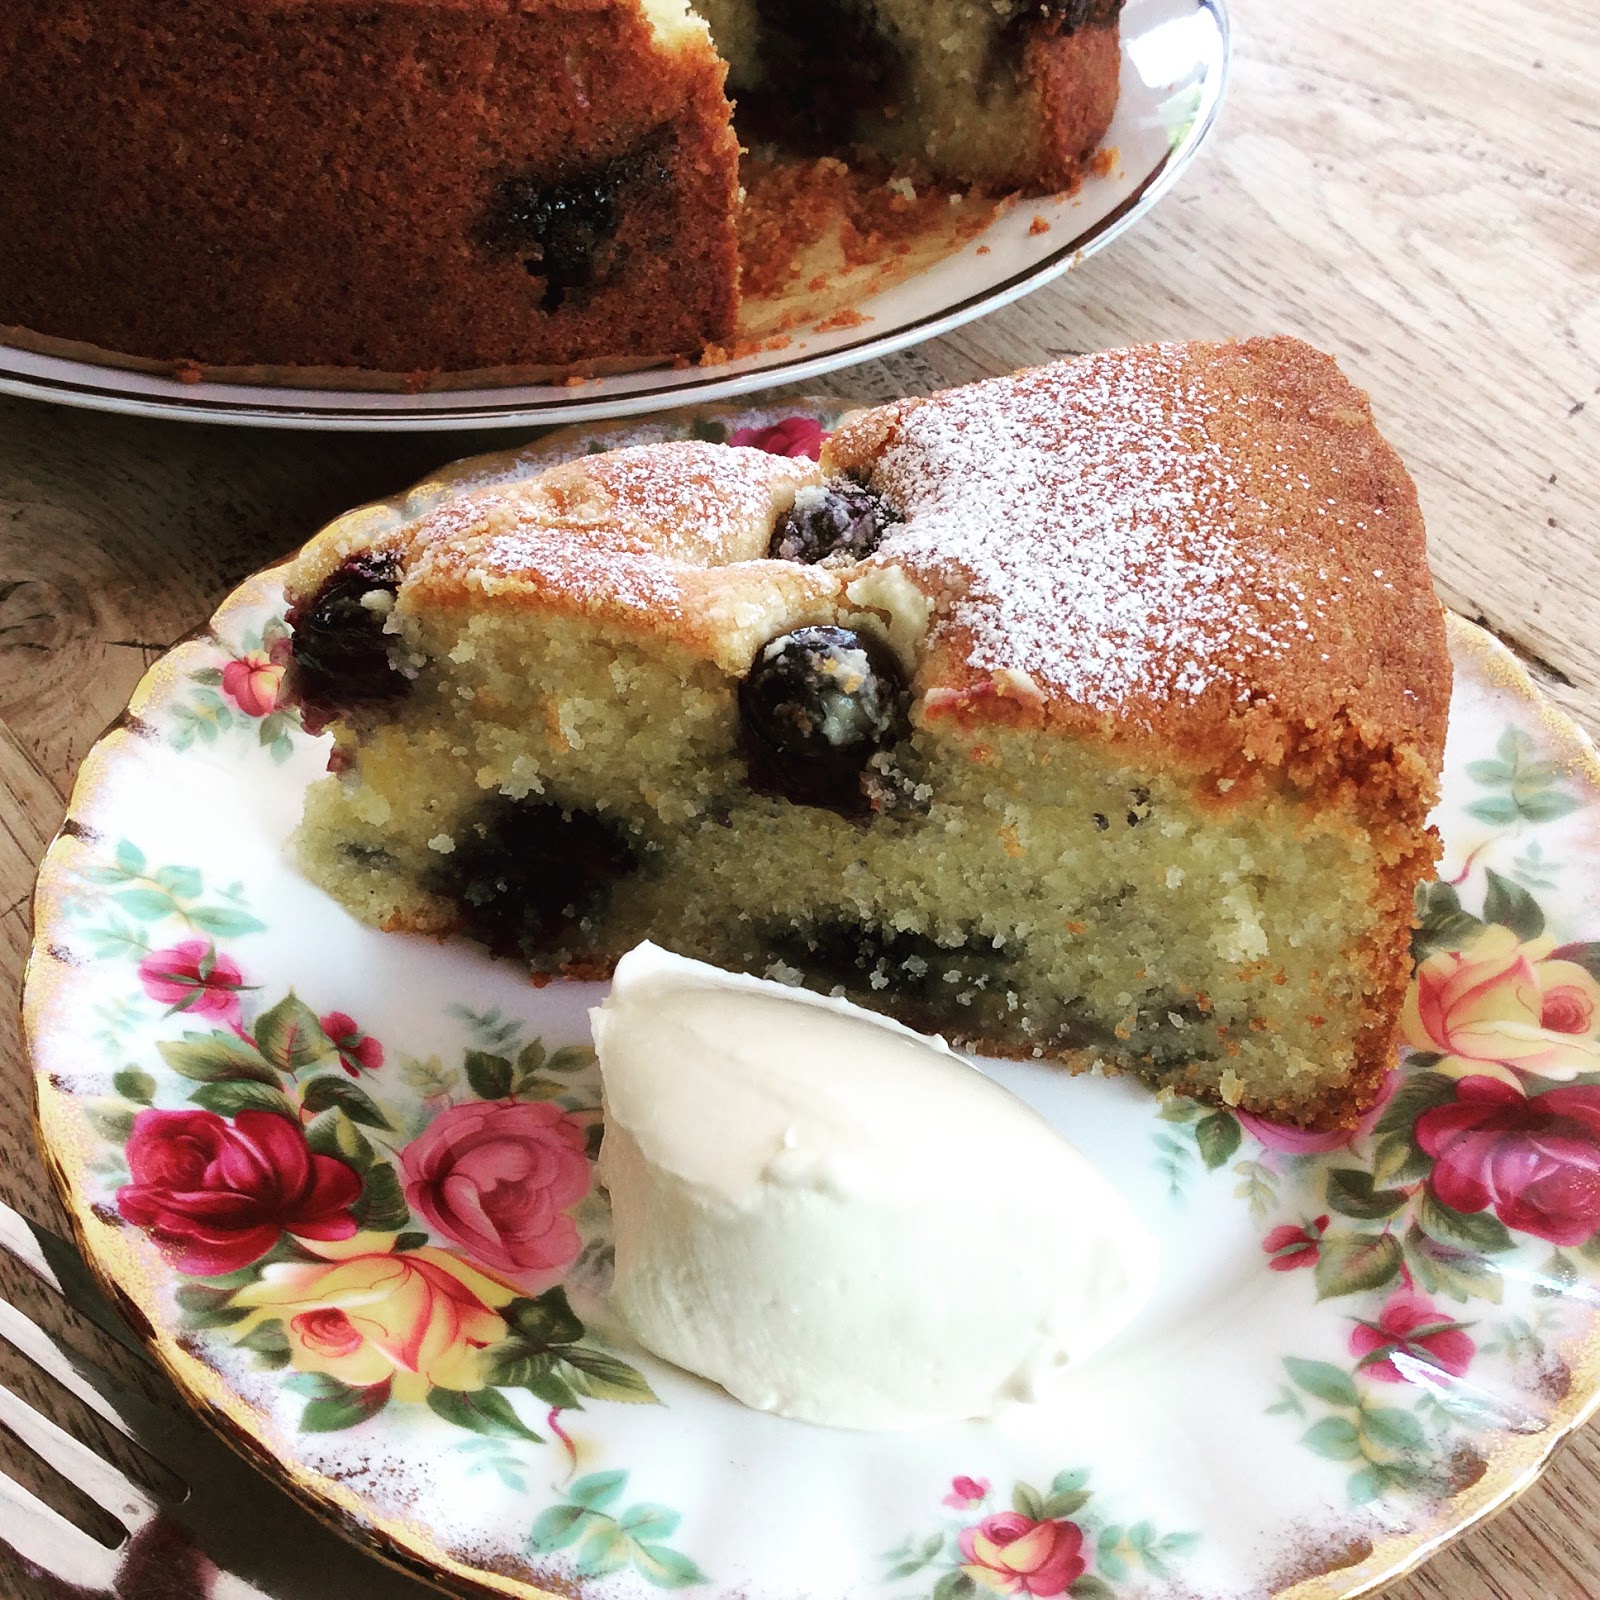
It's time again to join in with the Cake Slice Bakers (all the details are below). With the house taking up so much time I didn't manage to join in last month and almost didn't this month - this post is already three days late. I remember why I took a break from joining in with the Cake Slice Bakers last year... much as I love baking I often find the choices too complicated for my busy life, with too much frosting and frequently too sweet. And then I'm never that good at writing a post in time and doing all the links etc. But there was one cake this month that sounded too good to miss. Simple to put together, no fancy assembly required, no elaborate decorating. It's an everyday cake, good to eat at anytime of day and far too good not to share the recipe. The only downside is you are likely to eat too much of it in one sitting... a second slice is so tempting!  It is packed full of luscious jammy blueberries, flavoured with a subtle hint of lemon and the ricotta makes it unbelievably light. I don't think I have ever used ricotta in a cake before... who knew!


Blueberry  Lemon Ricotta Tea Cake

300g fresh blueberries
2 tbsp cornflour
227g softened butter
200g caster sugar
1 tsp vanilla paste
zest of 2 lemons
4 large eggs
250g tub ricotta cheese
250g plain flour, sieved
48g ground almonds
4 tsp baking powder
icing sugar for dusting.

  1. Preheat the oven to 170 deg C (150 fan) and grease and line a 23 cm springform pan
  2. Wash and dry the blueberries and toss them in the cornflour. Set aside
  3. In a large bowl, beat the butter, sugar, vanilla and lemon zest together until light and fluffy. Add the eggs one at a time with a little of the flour and beat until well mixed. Finally whisk in the ricotta to give a creamy batter.
  4. Combine the dry ingredients together and fold into the batter. Finally add 250g of the blueberries, folding them in
  5. Pour the batter into the prepared tin, levelling the top and scatter the remaining blueberries over the surface
  6. Bake the cake in a preheated oven for about an hour - this is how long it took in my oven but the book says bake for 80 - 90 minutes so do check to see if it is done by inserting a skewer and checking it comes out clean.
  7. Cool in the tin for about 15 minutes before turning out onto a wire rack. Dust with icing sugar.
This is best eaten warm, although still very good cold the following day (ask me how I know) and a dollop of creme fraiche on the side doesn't go amiss either! It is definitely one I will bake again.


Each month The Cake Slice Bakers are offered a selection of cakes from the current book we are baking through.  This year it is The European Cake Cookbook by Tatyana Nesteruk.  We each choose one cake to bake, and then on the 20th - never before - we all post about our cake on our blogs. There are a few rules that we follow, but the most important ones are to have fun and enjoy baking & eating cakes!
Follow our Facebook, Instagram, and Pinterest pages where you can find all of our cakes, as well as inspiration for many other cakes. You can also click on the thumbnail pictures below to take you to each of our cakes. If you have a blog and are interested in joining The Cake Slice Bakers and baking along with us, please send an email to thecakeslicebakers at gmail dot com for more details.
The Cake Slice Bakers also have a new Facebook group called The Cake Slice Bakers and Friends. This group is perfect for those who do not have a blog but want to join in the fun and bake through this book.


Our choices for June 2019 were ~


  1. Blueberry Lemon Ricotta Tea Cake


  2. Raspberry Cremeschnitte


  3. White Chocolate Raspberry Pistachio Mousse Cake


  4. Tiramisu Cake
  5. Blueberry Lemon Ricotta Tea Cake

      Raspberry Cremeschnitte

        Tiramisu Cake


          White Chocolate Raspberry Pistachio Mousse Cake


          • Note - this cake was not chosen by any group members

          • Friday, 22 March 2019

            The Cake Slice Bakers - March

            I’m two days late... assuming I finish writing this on Friday, but I have been baking once again with The Cake Slice Bakers. Exchange of contracts is imminent and despite weeks of sorting out, the house looks as though we have barely started clearing so the last thing I should be doing is baking cakes and writing about it... but I never was one for getting my priorities right, especially when there’s cake involved!


            We are baking this year from The European Cake Cookbook by Tatyana Nesteruk and the choices this month were

            1. Creme Brulee cheesecake
            2. Triple-Citrus Mousse Cake
            3. Austrian Pound Cake
            4. Toscakaka Torte

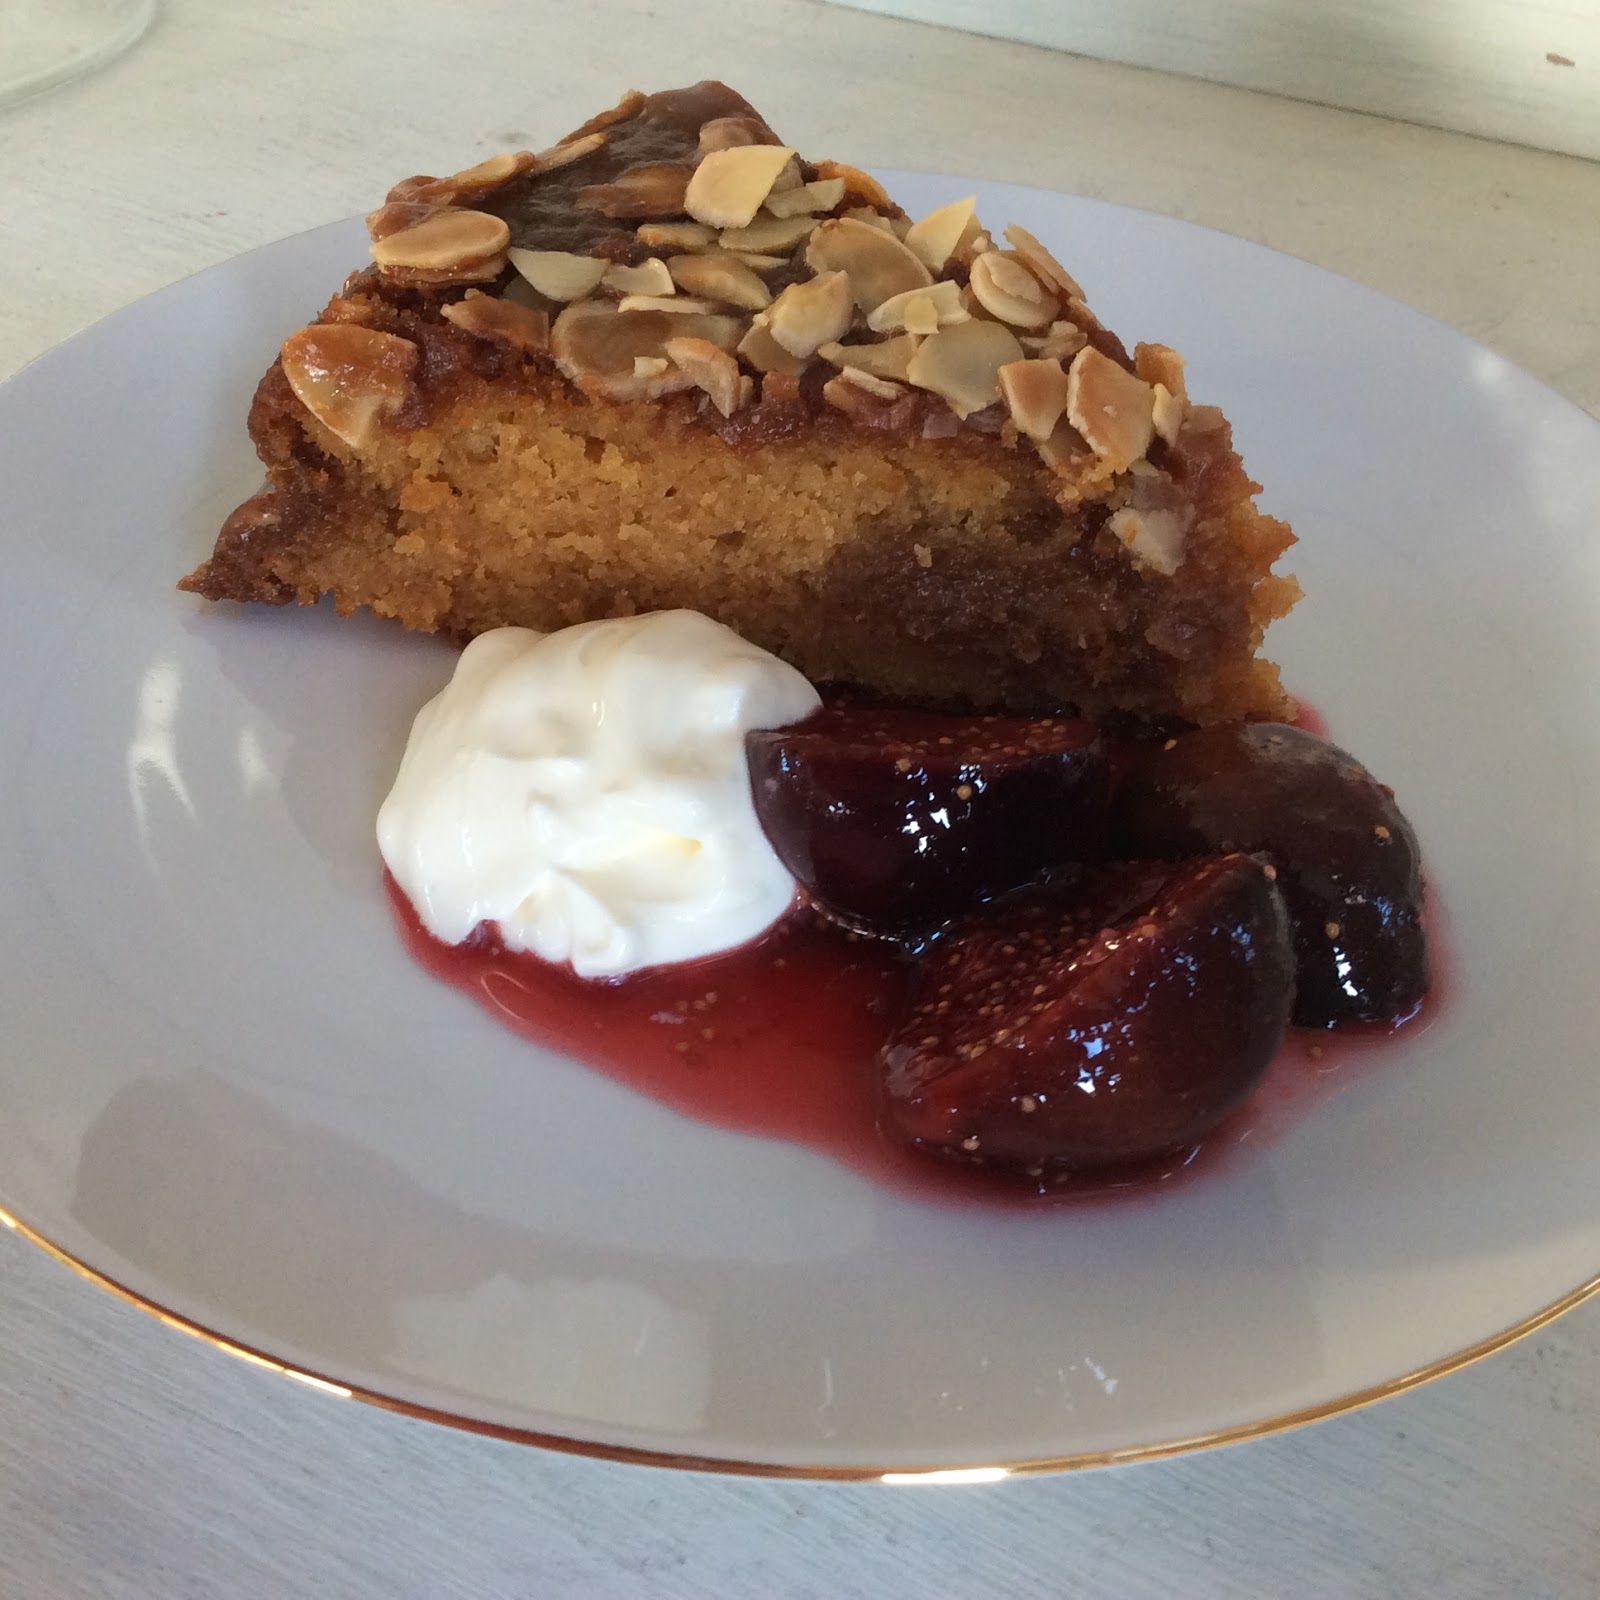
            As ever it was hard to choose and the cheesecake was very tempting given that if ever we eat desserts out, which isn't often, Stewart will always choose cheesecake and I will have Creme Brulee. However I wanted to make this for dinner guests and didn't want to risk something completely new so I chose the Toscakaka cake, a Swedish caramel almond torte. I own up, I have made this before from a different book with a slightly different recipe where it was just called a Tosca cake, so I knew I would be on to a winner. The combination of light caramel soaked sponge with a topping of caramel and crunchy almonds is delicious.

            The cake itself is easy but the tricky part is making the caramel sauce which starts with boiled sugar. I let my first batch get too dark and it tasted burnt so I had to start again.

            But second time around it worked and the resulting cake didn't disappoint. 


            It went down well with our dinner guests as dessert but it made a good cake for afternoon tea too!


            Ingredients for the cake
            • 170g unsalted butter
            • 100g caster sugar
            • 118 ml dulce de leche (thick caramel sauce)
            • 3 large eggs
            • 1 tsp vanilla essence
            • 118 ml full fat milk
            • 188g plain flour, sifted
            • 50g ground almonds
            • 3 tsp baking powder
            Ingredients for the topping
            • 200g granulated sugar
            • 60ml water
            • 118ml double cream
            • 60g unsalted butter
            • 2 tsp vanilla essence
            • 110g toasted flaked almonds                  
            •  

            1. Preheat the oven to 170 deg C (150 fan) and line a 23cm spring form tin with baking parchment

            2. In a large bowl beat together the butter, sugar, vanilla and dulce de leche until light and fluffy Add the eggs one at a time with a spoonful of flour with each addition, beating until smooth. Combine the flour, almonds and baking powder and gently add in two additions alternating with the milk until everything is just combined.

            3. Pour the batter into the prepared pan and bake for 35 minutes. The sides should be set but the centre just under baked.

            4. While the cake is baking prepare the caramel sauce. Combine the sugar and water in a small saucepan and heat gently until the sugar melts. Bring to the boil and let it cook until it turns a golden amber colour (not dark brown like my first attempt!) Remove from the heat and whisk in the cram, butter and vanilla. Be careful as it will splutter. Continue to whisk until it is smooth and the butter has melted.

            5. After the cake has baked for 35 minutes remove from the oven, pierce the top with a skewer and pour the caramel sauce over the top. Sprinkle with the toasted almonds and return the cake to the oven for a further 15 mins.

            6. Remove from the oven and let it stand for 15 minutes before releasing the spring form. Eat warm or cold!


            I served ours warm with a dollop of creme fraiche and a compote of honeyed figs.


            Wednesday, 20 February 2019

            Cake Slice Bakers - February

            Thank you for all the comments on my last post. I couldn't reply for a while for reasons unknown. Replies to comments just disappeared into the cloud, but today they are being published. It's a mystery! Anyway, it seem that Marie Kondo creates quite a difference of opinion, as does the whole subject of decluttering and moving house. I don't think it will be my last post on the subject. But today I'm writing about cake!


            For a little while I stepped back from the Cake Slice Bakers, a worldwide group of bakers who each year bake from the same book once a month and blog about it on the 20th of the month. It was a combination of not finding the time to bake and write a blog post about it regularly and also I wasn't enjoying the the last couple of books we were baking from. The books were American baking books and as a general rule American cakes tend to be a lot stickier, sweeter and heavier on the frosting than British or European cakes  and not really to my taste. So when I spotted the book choice for 2019 was The European Cake Cookbook I was tempted back. The author Tatyana Nesteruk is Ukrainian, brought up in Italy and now resides in California. The book even claims that the cakes are less sweet than their American counterparts.


            However, having seen the four choices for February I wasn't convinced! All consisted of several layers and were thick with frosting, a caramel honey cake, a lemon meringue cake (tempting!), Esterhazy cake, and a banoffee cake... definitely special occasion cakes rather than the sort of thing you would have in a tin to go with a cup of tea or coffee at anytime of day (I'm quoting from the back cover of the book). But as it happens we had a big family meal a couple of weeks ago and it was a good excuse to make one of the cakes for dessert so I chose the Caramel Honey Cake although I think all the choices would have made good desserts.


            The cake itself was a fat free sponge baked in three tins and with the use of my trusty mixer it took no time to mix up and get in the oven.


            The cake layers were soaked in a syrup of condensed milk and cream, which I thought would make it really sickly but in fact it just made the layers really moist and flavourful. Although I did opt to change the frosting slightly and used only half the amount specified. Instead of cutting each of the cakes in half creating six layers to be separated with frosting I just kept to the three layers, which automatically reduced the amount of frosting required. I think this was a good decision as it gave a good proportion of cake to sweet icing.  I like a butter cream as much as the next person I do think it needs a good proportion of cake to go with it... and this was just right. If I had gone with the recipe it would have been far too sweet for my taste. And it still made a very tall cake. The only other change I made was I toasted the pecans lightly before using them as I think it brings out the flavour.


            And the verdict... everyone loved it and I would definitely make my version again, not too rich and full of flavour.


            When our two year old grandson saw it he tipped his bowl containing a little malt loaf onto the floor and pushed his plate towards this towering cake instead!

            My Version of the recipe:

            Caramel Honey Cake

            for the cake:
            9 large eggs
            150 g caster sugar
            1 tsp vanilla extract
            118 ml of runny honey (1/2 cup)
            250g plain flour
            100g ground almonds
            2 tsp baking powder
            125 g toasted chopped pecans

            for the syrup:
            118 ml condensed milk (1/2 cup)
            118 ml double cream (1/2 cup)

            Frosting:
            227g unsalted butter
            250 g icing sugar
            200g dulce de leche (caramel sauce)
            1 tsp vanilla extract
            125g chopped toasted pecans (reserve some whole ones for decoration)

            • Pre heat the oven to 350 F, 180 C (160 fan) and grease and line 3 20cm round cake tins
            • For the cake, place the eggs, sugar and vanilla in a bowl (preferably a stand mixer) and whisk on high speed until pale and almost doubled in volume (About five mins). Add the honey and whisk for another minute. Sift the dry ingredients together in a bowl and fold gently into the egg mixture in small additions so not to get pockets of flour. Finally fold in the pecans.
            • Divide the cake batter between the three tins and bake for  25 - 30 minutes until completely set. Allow to cool in the tin briefly before turning out to cool completely.
            • Combine the condensed milk and syrup together and brush over the cake layers until it has soaked in thoroughly.
            • For the frosting, whisk the butter until light and fluffy. Add the caramel sauce and vanilla and whisk until combined. Add the sugar and whisk again until well mixed and fluffy
            • To assemble, spread a layer of the frosting between each layer of cake and then cover the sides and top with the frosting. Use the remaining nuts to coat the side and decorate the top with some whole pecans


            You can check out what everyone else has made hereby clicking on the link below... I think!

            Sunday, 6 May 2018

            What a Difference a Day Makes

            Our various trials and tribulations are still ongoing but a shift in perspective has made the past few days easier, helped enormously be the arrival of warm dry weather. Nothing like a bit of sunshine to lift the spirits. I felt like baking again for the first time in ages and made some granola bars, just for us. That was on Thursday but they are gone now. I'd forgotten how quickly cakes disappear in this house. When I first met Stewart he told me he didn't have a sweet tooth... Oh how we laugh about that now!


            I also made a savoury 'cake' for supper. Not a cake at all really but a vegetable pasta bake that just happens to be made in a cake tin. It was rather fabulous and I'll definitely be making it again. Joe sent me the link to the recipe (you can find it here) all the way from Costa Rica. He's been growing vegetables in his little back yard so I think he must have been Googling vegetarian recipes.


            It was meant to feed six... it fed three of us. Just saying!


            I've cracked on with the wedding waistcoats and have now finished the third one, in a lovely pale mint green linen. This one is for the groom. Number four is cut out ready to go.


            We've also worked in the garden, tidying and weeding and making the most of the lovely bank holiday weekend weather... my newly finished warm shawl obviously did the trick and has been consigned to the back of the wardrobe until autumn... let's hope I've not been a bit premature!

            I hope your bank holiday weekend is going well too!

            Sunday, 8 April 2018

            Salty, Sweet & Herby

            I drafted this post about a year ago - well I uploaded photos, but for one reason or another that was as far as I got and it sat there unfinished. Then the wild garlic season passed and it no longer seemed relevant, so I forgot all about it. But as the wild garlic season is once again upon us and as it is a while since I wrote about anything food related, I decided to find this abandonded draft.


            I was given this bunch of wild garlic by Helen when I took a bread making class with her last year. We used wild garlic pesto in some of the fabulous Italian breads that we made and I was bemoaning the fact that we didn't seem to have any grow near us. Although Helen was not willing to divulge her secret location for her harvest she did give me a huge bunch to take home.


            Back home I made it up into a large quantity of pesto - some was used to make savoury pastry appetisers, some was stirred through pasta and the rest was put into the freezer. Easy to make and so delicious. If only I could find an abundant local source, although I'm reliably informed that Waitrose will deliver which rather seems to defeat the purpose of foraging.

            Easy Wild Garlic Pesto

            In a food processor whizz up 100g leaves (I added some rocket to my wild garlic), 50g pine nuts, 2 garlic cloves, zest of a lemon and 200g olive oil. Stir in 50g Parmigiano Reggiano and season with salt and pepper.

            The beauty of a recipe like this is that you can substitute different leaves, oil, nuts and cheese depending on what you have to hand and get fabulous but different results each time. And so much nicer than anything you can buy


            Another quick but tasty snack of which we we are rather fond are Rosemary Spiced nuts. We first tasted them with pre-dinner drinks at the Cambridge Cookery School Cafe and they were so good I researched several recipes and had numerous trial runs until I came up with something similar... sweet, salty and very addictive.


            Rosemary Spiced Nuts.

            Mix together 1.5 Tablespoons oil or melted butter, 1 Tablespoon nigella seeds, 1 Tablespoon of honey or brown sugar, half a teaspoon of sea salt, half a teaspoon black pepper, half a teaspoon of cayenne pepper and 1 Tablespoon of chopped fresh rosemary. To this mixture add 230g of nuts (I like a mix of cashews and almonds) and stir well. Spread onto a baking sheet and roast in a pre-heated oven 170 deg C (150 fan) 325 deg F for 17-20 minutes, giving them the occasional stir. Leave to cool, stirring now and then to break them up, and store in an air tight jar... although to be honest ours never get to the storage stage.


            Perfect with a gin and tonic!


            And while I'm talking recipes, five or six years ago I posted a recipe for bread pudding (probably the last time I made it) and I think it must be my most viewed blog post ever. New comments are always popping up as someone else discovers it. Obviously the tag 'bread pudding' must get put into search engines on a regular basis... or something like that, not that I claim to understand!

            Friday, 9 February 2018

            The Four Pillars

            Blogging really feels like it is taking a back seat the moment, which is frustrating because there is much I would like to write about but as always is the way when there is lots happening there is no time to write. Of course when there is plenty of time to write I've nothing much to say!

            Despite being busy I'm still trying to follow the advice in Dr Chatterjee's book The 4 Pillar Plan, trying to improve how I relax, eat, move and sleep. For each of the four 'pillars' there is a five point check list and until I started writing this I thought I was doing really well... oh how we can fool ourselves!


            For relaxation he suggests carving out some 'me time' each day. It can be almost anything that is solely for me that doesn't involve a screen plus I mustn't feel guilty about it. If nothing else I read a real book for at least 15 guilt free minutes a day so I think I can consider that ticked. I also eat at least one meal around a table... in fact we generally eat all our meals at the table. so that is two points ticked... however keeping a screen free Sabbath (or any day I guess) is not something I've done, nor a daily period of stillness... although when I'm laying awake unable to sleep I try to meditate on my breathing. Does that count? The fifth suggestion is to keep a gratitude journal which I sort of do mentally but just forget to write it down. He suggests doing it last thing at night but it's just about the last thing I think about... too busy thinking about that elusive sleep!


            I'm not scoring so well on the moving either. I mostly manage 10,000 steps a day but strength training, high intensity intervals training, exercise snacking, daily glute exercises? I don't think so... I really must reread that chapter! Sleep is not scoring so well either. I can appreciate an environment of darkness for going off to sleep but I actually like the arrival of daylight to wake me up. Plus I'm not about to get new curtains. I did a few days with no screen time in the evenings (until I discovered the ancestry research) and even a few days with no caffine in the evening but even though I have tried really hard  I find most herbal teas revolting and as there was no discernable difference in my sleeping pattern I've reverted back to old habits. At least I get twenty minutes of daylight outside every morning.


            But for the eating I'm scoring four out of five (if you have the book you will know that he suggests it is far better to score two in each pillar than a high score in one and nothing in others... but we'll gloss over that for now!) Retrain taste buds to de-normailise sugar... tick, Eat five different veg a day... tick, eat all my food within a twelve hour window... tick, unprocess my diet... tick! The only thing I struggle with at this time of year is drinking eight glasses of water a day. I do try but mostly forget. And when I do remember, I spend half the night up and down needing a wee, so it doesn't do much for me getting a better night's sleep


            But I'm really enjoying the food... breakfast is always a favourite meal especially every conceivable porridge variation - the current favourite is made with blueberries and topped with yoghurt and slices of kiwi. Or maybe fruit and yoghurt topped with homemade granola... so much nicer than any supermarket brands. 

            Homemade Granola
            I warm up 25g butter with 60g nut butter (usually almond) and 60 g honey. Stir that into 300g oats along with 75g chopped nuts (almonds, hazelnuts and pecans all work well). Spread this onto a baking tray and bake at 180 deg C (160 fan) for 15 mins, turning half way through the cooking time. Do set a timer as there is a fine line between toasted nuts and burnt! Allow to cool and stir in a handful of dried cranberries (or raisins) before storing in an airtight container.


            Soup is always an easy way to eat several portions of vegetables for lunch and I've been making soda bread each week to go along with it.

            Seeded Soda Bread
            Mix together 450g wholemeal bread flour, 75g mixed seeds, 1 teaspoon salt and 1 teaspoon bicarbonate of soda. In a jug combine 1 tablespoon black treacle with a carton of buttermilk and top it up to 450 ml with some cold water. Mix well into the flour mixture and allow to stand for five minutes while the oven heats up to 200 deg C. (180 fan) Shape into a loaf, place on a baking tray and bake for 30 minutes.


            And just in case you think I'm being too virtuous to be true... there were some date and walnut muffins this week (and some chocolate, but that's a secret!) 

            So that's where I am with the four pillars... not doing as well as I thought but I generally keep good health and have plenty of energy, plus I have shed a few pounds since the new year so it can't all be bad. I shall definitely stick with it.

            I hope you have a good weekend!

            Saturday, 20 August 2016

            A Blackberry Cheesecake

            Another month and another post for the cake slice bakers, baking from Maida Heatter's Cakes. Some months I could quite happily make any of the four choices, but other times like this month there is no contest. Three of the cakes were multi layered extravagant sounding affairs suitable for celebrations, with too much frosting... and too much effort for my liking! There was a four layer chocolate cake with a chocolate sour cream icing, a three layer pecan sweet potato cake witha marshmallow filling (the cake sounded interesting but the frosting sounded sickly sweet), and a three layer carrot cake with a cream cheese frosting. I'm hoping the other bakers will have made these so I can decide if they are worth the effort! But there was also a Blackberry Scotch Cheesecake which was just asking to be made... especially as it used frozen blackberries which I just happened to have!


            I'm not always that keen on the usual digestive biscuit base used on most cheesecakes as I find they can be a bit soggy, so I was intrigued by the idea of a shortbread crust and had high hopes of it staying firm and crunchy.


            The cheese mixture is a wonderful combination of cream cheese, cinnamon, blackberries and Drambuie... which I confess I bought specially! It tasted amazing (yes... I did lick the spoon)


            The blackberries are used frozen and are dotted over the surface of the cheese mixture before baking. I had a tub of blackberries that came from Mum's garden before she moved.


            Maida claims the blackberries turn a gorgeous shade of shocking pink once baked and she is not wrong!


            Once baked it gets a sour cream topping which gets another five minutes in the oven.


            Although it wouldn't have effected the taste, my cheesecake cracked as it cooled and as I was planning on taking this as a dessert to my book club meeting (the book club that is really a girl's supper club masquerading as a book club) I decided to pretty it up with a blackberry sauce as I had some blackberries left over.

            I tried some arty drizzling and then decided it looked better spead all over! I was going for a Jackson Pollock effect which I didn't quite pull off!


            And the result... even if I do say so myself this was a pretty amazing cheesecake. Everyone loved it, second helpings were had, requests were made for me to make it again and it was generally agreed that the blackberry topping was definitely worth doing, the sharpness offsetting the sweet cheesecake. If there was one critisism, it was that the base did not stay crunchy but it still tasted fantastic and I have already made it again for one of our book club members... and her response was "I want to pass on rapturous thanks from all seven very happy cheesecake eaters - absolutely delicious". I can see this being one I will make again and again.


            And should you wish to try this yourself (I promise you won't regret it) here is my version of the recipe:

            Blackberry with Scotch Cheesecake (adapted from Maida Heatter's Cakes)
            You will need a 9" (23 cm) springform pan. Preheat the oven to 190 deg C (170 fan), 375 deg F

            Ingredients:
            • 140g sifted plain flour
            • 50g caster sugar
            • 112g butter
            Either in a food processor or by hand rub the butter into the flour and sugar until it is the texture of breadcrumbs. Spread this mixture into the unbuttered pan and press down with your fingers or the back of a spoon to make a firm crust. Bake for 20 -25 minutes until golden brown. Meanwhile prepare the filling
            • 550g Philadelphia cream cheese (don't be tempted to buy the light version)
            • grated rind of 1 lemon
            • 1 tablespoon lemon juice
            • 2 teaspoons vanilla extract
            • 2 1/2 tablespoons Drambuie
            • 1/2 teaspoon cinnamon
            • 150g caster sugar plus 1 tablespoon
            • 3 medium eggs
            • 200g frozen blackberries
            • 415g sour cream
            Method:
            • Put the lemon juice and rind into a small bowl. Set aside.
            • In a large bowl and using a hand mixer, beat the cheese until soft and smooth.
            • Beat in 1 teaspoon of vanilla, the Drambruie and cinnamon followed by the 150g sugar
            • Add the eggs one at a time, beating well after each addition.
            • Carefully butter the sides of the pan by brushing a little melted butter down the sides to the top of the crust.
            • Pour the mixture over the baked crust and then evenly place the blackberries, one by one, over the cheese mixture, gently pushing them down so they are partly submerged.
            • Bake for 35 - 40 minutes until the sides of the cake have risen and browned  but there is still a wobble in the centre.
            • Remove from the oven and allow to stand for 20 minutes.
            • Meanwhile mix the sour cream with 1 tablespoon of sugar and 1 teaspoon of vanilla essence. When cake has stood for 20 minutes pour the sour cream mixture over the top and bake for another 5 minutes.
            • Cool in the tin before turning out and then refrigerate for several hours or overnight.
            If you want to add a fruit topping, in a small saucepan heat up 150g blackberries with a tablespoon of lemon juice and a couple of tablepoons of sugar, to taste. Simmer until the fruit is soft and then push through a sieve to make a thin puree. Allow to cool and add a dash of Drambuie before artistically splattering over your cake!