Showing posts with label buttons. Show all posts

Monday, 12 March 2018

A New Coat

Before I tell you about my new dressing gown coat, I must thank everyone who left a message of support either in the comments or via email etc. after my last post. Knowing there are so many people thinking of us and giving words of support really does make a difference. I don't really like to focus on the rubbish stuff on my blog but once in a while it doesn't hurt to remember life isn't always a bundle of fun and we all have difficult times to bear now and then. But today this little online space will go back to being a place of creative escapism. Do you remember the expensive wool fabric that I bought way back in October? Bought entirely on a whim with the idea I would make a coat.


I loved that fabric so much I couldn't bear to to cut into it (translated as I spent so much on that fabric I didn't dare cut into it)


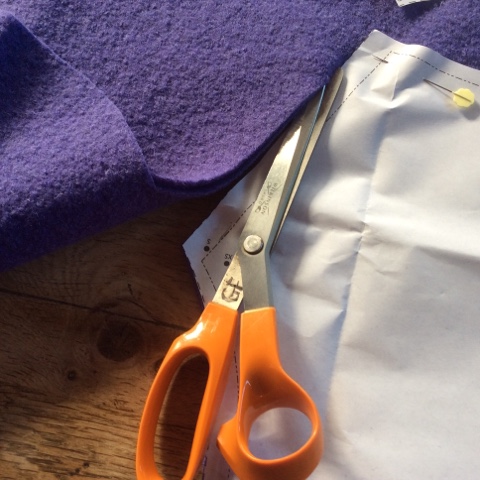
It is a very easy and simple pattern so I decided to adapt it ever so slightly to give it a little more interest and I added some sleeve turn ups and pocket flaps... nothing too adventerous. But still I didn't cut into the fabric!


But eventually I was brave and cut it out... ignoring the advice of more experienced dressmakers that I should consider a toile. But I have made Sew Me Something patterns before and I know they fit me well... so I threw caution to the wind!
 
It stitched up in no time at all as there was no need to finish off the seams and I even added some double rows of topstitching as well as some home made Yorkshire buttons on the pockets


All finished, I tried it on and it fitted well, the shoulders were in the right place, the sleeves were the right length but somehow it felt wrong. More like a dressing gown than a coat! And so it hung on the outside of my wardrobe door for two months reminding me I had made a ridiculously expensive dressing gown.


Until Saturday, when I had an unexpected trip to Covent Garden to teach a rag rug class and I decided to throw caution to the wind and wear my dressing gown to London. And amazingly no one stared at me on the train as though I was rather odd (I didn't wear my slippers and nightie... just saying) and in the end I decided I quite like my new coat


I might even wear it again!

Monday, 1 September 2014

Feeling Brighter!

Thank you once again for all the kind comments... and as you can see, all it took was a couple of nice days out at the weekend and I'm starting to feel a bit more like my old self... and here I am blogging again. I can't stay away!
 
 
Yesterday Laura Kemshall wrote about how she seems to collect empty sketchbooks and she challenged herself to make a drawing a day, starting today on 1st September. She also asked if anyone would like to join in. Well, I have a ridiculous amount of empty sketchbooks... these are a mere fraction. I cannot resist those lovely empty pages and I'm constantly buying new ones, convincing myself this will be the one to make me draw every day. And I'm not even going to tell you how many there are with just one or two pages filled. It's a disgrace!

 
So I've decided to join in... just a quick 10 - 15 minute sketch each day. And then maybe by the end of the month drawing every day will be such a regular habit, I won't be able to stop

 
Today I drew my lunch (well - part of my lunch). Nothing wonderful, especially when you see Laura's fabulous drawing today,  but I've done it.... and I'll keep you updated with my progress. If I'm sharing on here I might actually do it!

 
I've also done a little more painting in my Frida Sketchbook

 
They are meant to be drawings of Mexican tin art, but I'm beginning to think I could have a new career as a tattoo artist!

 
I've also remembered that over two weeks ago I said I had some buttons to give away. With so much going on at home I had totally forgotten, so today I picked out a name and the buttons will soon be on their way to Marian.


Saturday, 16 August 2014

Not One, But Two

I was all set to make another reversible skirt from my recent fabric purchases when I remembered that I had actually bought some fabric a couple of months ago that was also destined to become a skirt... except that after I had I pre-washed it ( a lesson learned because my original skirt is now just a tad too small!) it then got tidied away in my pre-open studios clear up and promptly forgotten about.
 
 
So, there was nothing else for it really... but to make two skirts this week! This was my first one made from a lovely duck egg blue/green fabric printed with French Patisserie images (bought from The Creative Sanctuary) ...

 
And lined with pink spots...

 
Although pleased with the results, my favourite part of all are the buttons which I absolutely love.

 
And so to my second lot of fabric bought last Sunday (from Little Laura's Haberdashery), in very similar colours...

 
And now I have skirt number two, finished this morning.

 
Also with rather fabulous buttons!

 
By pure coincidence, whilst knitting with friends yesterday morning, Pam presented us all with a gift of fabric with instructions to make a drawstring bag... and the fabric she had picked for me just happened to be the same pink baking fabric I've used for my skirt.

 
So when I finished the skirt, I knew I had to make myself the matching bag.

 
I'm now feeling very pleased with myself having finished off two projects in one day... although the bag was super quick and easy... so thank you Pam! Perfect for keeping my knitting tidy! You can find the tutorial to make the bag here.

 
All this playing with fabric does mean that I've now got to get my head down and get some actual work done in the next couple of weeks. I put aside August for catching up around the house and garden as well as finishing off some of my own projects and so far I've not even started... and August is half way through with very little to show for  it...

 
Except of course, there are some rather nice buttons... speaking of which I got carried away with the little blue/cake buttons and I made too many...

 
So if you could make use of a little set of cake buttons than leave me a comment to let me know and I'll pick out a name and send you some!

Sunday, 15 December 2013

Advent :: day fifteen

You might want to sit down... another mini tutorial... two days running... boy, am I good to you!
 
 
If you follow Planet Penny you will know that Penny is also doing a blog post each day in a Christmas countdown and on day four she featured buttons.  I was rather taken with the button garland being as I have recently acquired a large number of pearly buttons (hence those Christmas cards!)....so I figured out how to make my own (I confess, it wasn't exactly rocket science) 
 
So, to make your own button garland you will need a stash of pearly buttons... cut them off your husband's shirts if necessary... you can always let him sew them back on after Christmas, a suitable sparkly thread and a smallish crochet hook.

 
Thread all the buttons you wish to use onto your thread and start off by crocheting a length of chain.

 
Slide your first button up towards your hook and crochet the next chain as if the button wasn't there, which will hold the button in place.

 
Continue to crochet another section of chain - the number of chain you crochet will determine how spaced out your buttons will be along the garland - I made about 20 chain between each button. Then add your next button as before.

 
And carry on like this until you have used up all your buttons, finishing with a length of chain.

 
And of course, they don't have to be pearly and white...

 
As colourful works too!

 
And if you don't fancy a garland I can imagine they would make a fun necklace or bangle if the buttons were more closely spaced... off to give that a try right now!

Sunday, 23 June 2013

Kaffe's Cap

It all started with a handful of white plastic buttons from my vast collection...
 
 
plus a teaspoon of transfer dye in a small pan of water in which to simmer the buttons for 5 minutes. Tempting though it might be do not attempt to poach your eggs at the same time if you try this at home. Fuchsia eggs are not appetising...

 
However, fuchsia buttons are very pretty.

 
Armed with this collection of pretty buttons I made myself a Kaffe Fassett inspired buttoned cap.

 
I love it, but it really did take forever... I crocheted the cap in a couple of evenings but have spent the entire weekend sewing on buttons.

 
One hundred and forty three buttons since you ask... plus eighteen beads.

 
And I hate sewing on buttons... so I think my plans for further buttoned hats might be put aside for a while.

 
I'm wondering whether Kaffe Fassett hates sewing on buttons too. Maybe that is why his hats cost £480 at the Fashion and Textile museum.

 
Not sure I would get away with charging that much!

Monday, 25 February 2013

Beaded Buttons

Once in a while it is good to try something new. I would never call myself a beader. I don't have the patience to really get to grips with the craft and I have a lot of trouble with keeping my thread under tension. There have been many a beading project where I've come to the end and discovered a bead dangling in the middle of my work. But at Textiles in Focus last week, Sarah from Bee Crafty asked me if I would like to try out her Beaded Button Corsage kit.... well... it would have been rude to refuse!
 
 
I picked out a green and purple kit from the several kits Sarah had prepared specially for the show. The first step was to cover the button and stitch on the beads which was easy following the excellent step by step instructions.

 
Next I had to gather up the beautiful shaded silk ribbon included with the kit (and decide whether to have green or purple on the outer edge.)

 
And then combine the two to make the corsage. At this point I have to confess that although I love the beaded button and think that the shaded ribbon is gorgeous I'm not that keen on them combined... but I'm aware that is just a case of personal taste. For me it feels a little bit too much like a rosette. But however you end up making up the kit, it is excellent value with very clear instructions and with plenty of beads left to make more than one button...

 
Which is a good thing because I love my beaded button.... so much so I've even made another one!

 
And today I've been trying out something else new... but that will have to wait for another post!