As promised, some monoprinting. For those new to the technique it is a simple method of producing a "one-off" print or image from an inked plate. Because it is necessary to work quickly the prints have a lovely textured, painterly quality. You will need to assemble some basic equipment and clear a space on your work surface.
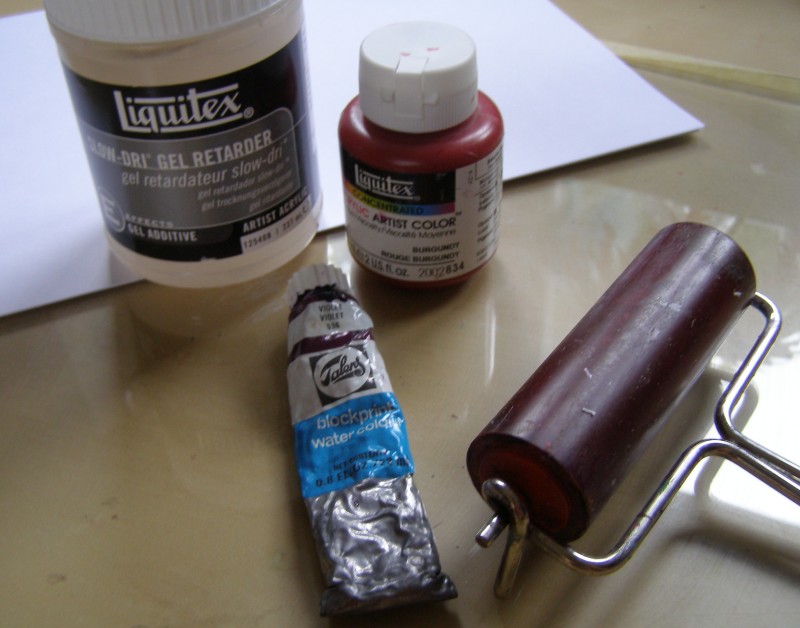
- You will need a flat surface onto which you will apply the ink. Ideally this should be a sheet of glass or perspex, although you can achieve good results by using a plastic document wallet. This is your plate.
- You will need a printing ink or acrylic paint. For easy cleaning, water based media are best but they do tend to dry very quickly. If you are using acrylics you can buy a gel retarder which slows the drying time a little but the fact that everything dries quickly means it is necessary to work quickly which gives lovely spontaneous results.
- You will need a roller - this is essential.
- Finally you need a stack of thin paper. It is important that it is thin and I find cheap copier paper is fine.

Put a small amount of your print medium at the top of your plate. It is important not to use too much or you end up with a very splodgy print.

Using the roller, spread the ink into an even layer over the surface of the glass.

You will know it is ready when it sounds sticky (not easy to show in words and photos!). If the roller is sliding then the ink is not spread out thinly enough. When it is ready you need to drop a sheet of paper onto the surface without applying any pressure. Finger marks will show up on your print!

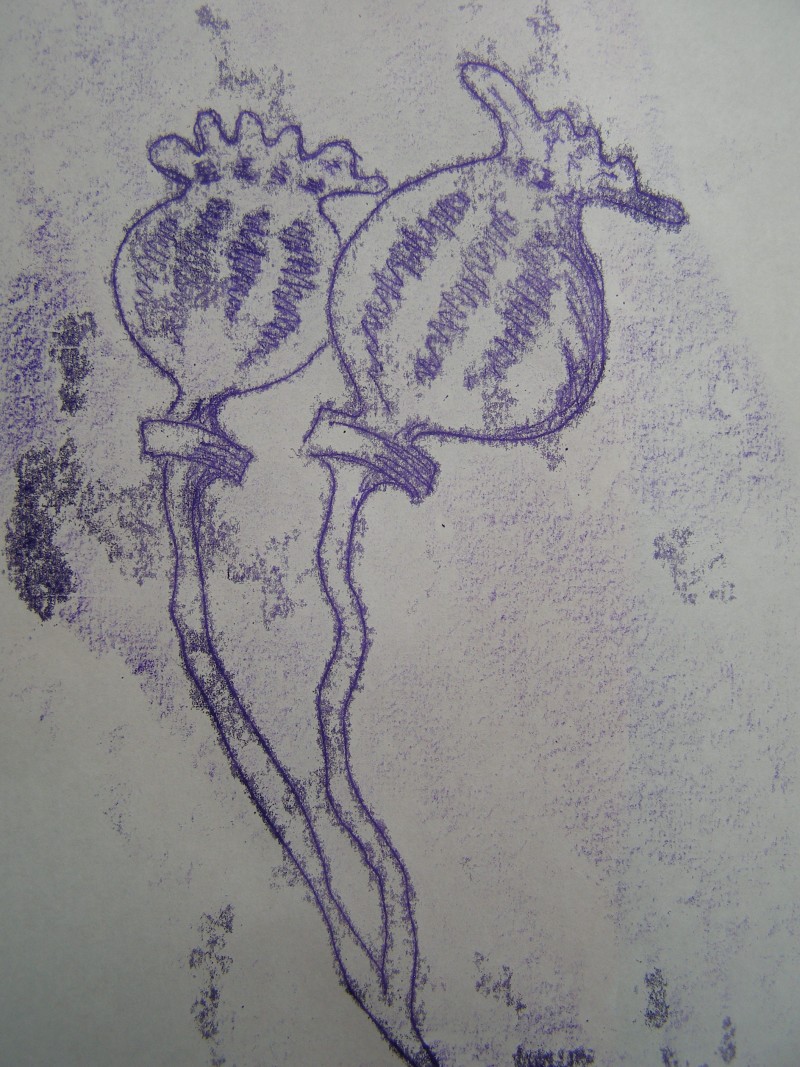
Using something with a sharp point (I find a biro works really well), draw your design on the reverse of the paper without resting your hand on the paper. Only the tip of the pen should be making contact. This gives an element of "lack of control" which I think adds to the quality of the print. If you are not confident about drawing, you can trace around a photograph or simply make patterns or marks.

When you have finished gently lift the paper off the glass sheet and all being well you should have your first print. Sometimes they come out indistinct or a bit blotchy as a result of either too much ink or of being too heavy handed but with experience you can learn to gauge how much ink/pressure to use.

You then simply ink up your plate again... and make another print!

This shows how your print is the reverse of what you have drawn.
There is nothing to stop you adding a second colour ink to the plate if you want. Just remember to keep working quickly.


Sometimes, after taking a print and before re-inking the plate you can get a second "ghost print". After making the image above I quickly laid a second piece of paper onto the plate and gently rubbed over the surface with my hand.

And when I lifted it off I had a print of the marks made where the ink had lifted off the plate for the first print, creating a negative image. This doesn't always work as it depends on the amount of ink left on the plate.

You will get to the stage where everything starts to feel a bit sticky and the prints become very blotchy and this means the ink is getting too dry and you need to clean the plate and start again. The image below is one taken when the ink was a bit too dry.

But I rarely throw a print away and I've rescued this one with some added water colour once the print was dry. The beauty of this process is that for an hour or so working you end up with dozens of images which can be worked into, cut up, painted over with your chosen colours (I've not forgotten this is meant to be colour themed) and then stuck/collaged into your sketchbooks and I will be back with some ideas of how you might do this as well as some more monoprinting ideas.

And when it comes to cleaning up... baby wipes work a treat!

I am fairly certain that I will probably have left someone out... and I'm sorry but I'm starting to lose track of everyone who is taking part in this (If I knew what to do I could probably create a Flickr album for you to post your own photos... but I don't!)... but these are at least some people who are creating beautiful sketchbooks:


I've never tried this technique Gina and will have to have a go. I love the ghost print and your 'rescued' image. It's a bit scary as I'm a ditherer when it comes to drawing - no time for that! Thankyou once again.
ReplyDeleteI really like the ghost print! :)
ReplyDeleteVivienne x
Brilliant! I love mono-printing and this is just what I need to give my aching shoulder a rest from all the frantic crochet!!
ReplyDeleteWe're unexpectedly at home for the next two days so I may have to get the kids to do this one too.
I love the images you got from your prints, especially the ghost print.
xxx
Fabulous process and I love the images that are breaking down.
ReplyDeleteYou're a genius. Never did any monoprinting but it seems so easy that I might give it a try.
ReplyDeleteEnjoy your sunday.
Looks great Gina, will definitely have a go !!
ReplyDeleteTwiggy x
the drawing side would scare me to death Gina. would definitely have to be drawing over an outline of a picture. lol I do like the print that resulted where the ink was getting to dry though.
ReplyDeleteAn amazing technique for the hand drawn quality! Absolutely love Mono-printing. Have you tried Collograph printing?
ReplyDeleteTake care x
Ooohh this looks messy and fun I can't wait to have a go just need to get some of the retarder stuff. I love the print coloured in with the water colours.
ReplyDeleteIsn't monoprinting fun, I love the smudgey, mottled effects you can get; well done!
ReplyDeleteenjoyed doing this before so look forward to having another go and hopefully I will get some improved results. Have a great holiday xx
ReplyDeleteYou could try this, to keep track? http://www.simply-linked.com/
ReplyDeleteExcellent ideas - thanks!
ReplyDeleteFantastic tutorial and some great ideas. Thank you!
ReplyDelete