Showing posts with label sketchbook project. Show all posts

Wednesday, 4 May 2011

Busy Doing Nothing?

It feels as though I've not been here for ages... perhaps because I've not been here for ages??? But there has been much going on.


All of which could warrant their own blog post but as always happens when there is lots to blog about there is never time to do it... and when I've got the time nothing interesting seems to happen.


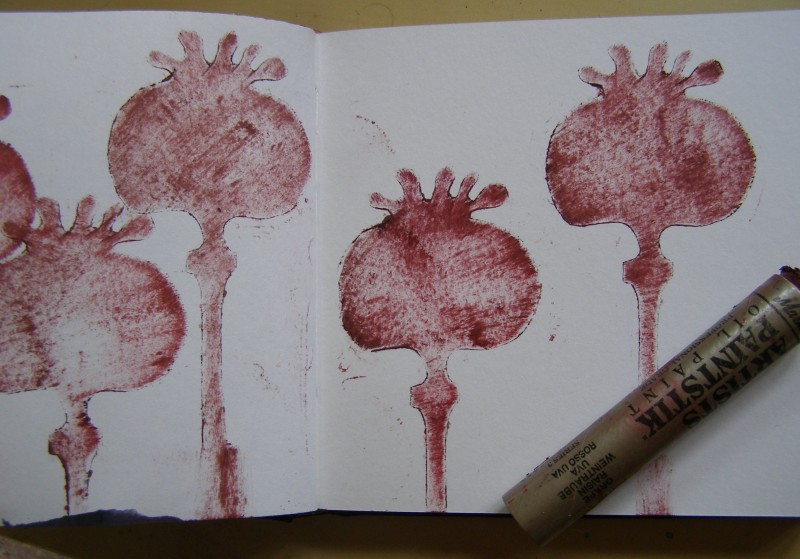
Today I've been with SPECTRUM, my group that meet in Ashwell. We are working hard towards an exhibition for early next year and today we have been developing work in sketchbooks... remember this sketchbook project? Well I'm still going with it (and encouraging the other group members to keep going with it!) and today I demonstrated some monoprinting with limited success...


But the addition of some coloured inks this evening has perked them up and I think I quite like them after all.

I might be back tomorrow with some photos of some of the other things I've been up to... but don't hold your breath!
(What is going on with Blogger spacing???)

Tuesday, 24 August 2010

From Sketchbook to Stitch

Having explored the poppy seedhead motif in my sketchbook, I decided it would translate well into stitch using layers of sheer fabrics.

So I decided to try it out by making a book jacket for my sketchbook.

As well as the red and blue sheer fabrics I used a sparkly type of iron-on transfer material* that I've been trying out for Angela

I confess I wasn't too excited by the glittery sparkly stuff when I first tried it but I think it works quite well here layered up under some black chiffon and I quite like it.

I also confess that the colour scheme was largely dictated by the materials I had to hand but I actually quite like that too.

And I feel encouraged to experiment a bit more with these shapes

And possibly even the sparkly stuff!

I might remove the book jacket until I've finished working in my sketchbook though as knowing me it will be covered in paint in no time.

*Tissue Glitter Thermocollant

Saturday, 21 August 2010

Sketchbook Project VIII

In the last sketckbook post I suggested that you could also stencil directly onto the white page.

Which is what I've done here using Markals and a toothbrush again.

I then added a wash of water based colour which gives a more subtle shadowy effect than when you stencil onto a ready coloured page.

And if you use different colours, it looks different again.

The point here is don't just try each technique once and think that's it... try it it with different colours, different media, different images etc. As always it is about exploring and playing to see how far you can take each idea. By starting with one of your initial drawings and developing it in this way you are exploring design ideas such as shape, colour and line, which in turn will help develop your design ideas when translating them into textiles. This in turn will make your finished work much stronger... trust me!


An example of this type of playing occured when I wondered what would happen if I stencilled onto this piece of recycled wrapping paper (I never throw wrapping away!)

I chose a stencil colour to blend with the glitzy foiling on the paper and then stuck it down in my sketchbook.

Then I washed over the whole image with toning colours.

I love the way the resulting image shimmers and shines, catching the light... like a precious piece of Indian textile. I'm not sure where I will take this idea but I have visions of shimmering brocades!


I'll be back tomorrow with some stitching that has resulted from this exploration of the poppy seedhead shapes. (I'm not sure why it still says Saturday at the top of this post... I've changed the post options three times now but it keeps reverting back!)

Friday, 20 August 2010

Sketchbook Project VII

Oh ye of little faith... I resisted temptation and spent a grand total of £6.50 whilst at the Quilt show yesterday. But that's a post for another day because today it's back to the sketchbooks and some stencilling!

First of all colour some pages in preparation. I've used some spent procion dye for this but any water based medium will work. Then you need to select a strong image from your previous pages that can be reduced to an outine shape. Draw this into some card. Cereal packet weight will be fine. If you want to do a lot of stencilling then it's worth cutting your stencils from acetate sheets but I find card works well enough for a few applications.

Carefully cut around your outline. It's worth doing this carefully because then you can use the cut out shape too.

Position your stencil onto the page. I use a little bit of spray mount to hold it in position because I never seem to be able to stop the stencil slipping if I try to hold it in place, although I'm sure some masking tape would work too.

For the first exercise I've used Markal paintsticks (Shiva sticks) which are pure pigment held in an oil and wax mixture. If you are not familiar with them I can recommend this book by Ruth Issett which is available from ArtVanGo (along with the paintsticks)

Apply the paintick around the edge of your stencil. Apply generously and use more than one colour.

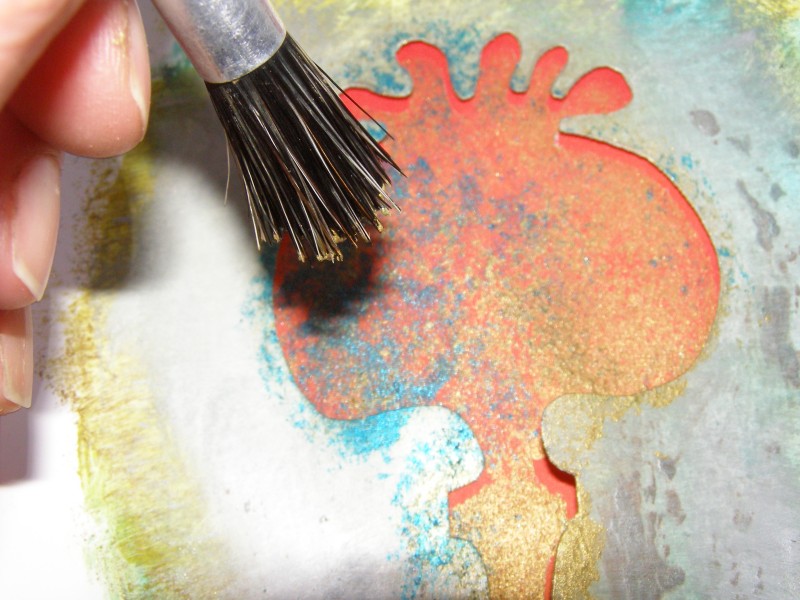
Now using a toothbrush (I recommend you use one just for this and not your husband's), brush the colour from around the edge of your stencil into the space on your page.

When you feel you have transferred enough colour, lift your stencil and your should be left with a clear strong image. You could of course do this onto a white page and then apply your water based paint. The paintstick will provide a wax resist as in the last sketchbook post.

You can then repeat the process on different parts of the page. If you use the same stencil without applying additional paint stick you get fainter, shadowy images. (I'm already thinking sheer fabrics here!)

If you don't have paint sticks you can still use the stencils with acrylic paints or some other thicker paint medium. Put your stencil back on the page as before.

Load up a brush (preferably a stencil brush which has a flat end) with paint and then remove any excess paint on a scrap of paper. Your brush should be quite dry.

And with quick jabbing movements apply the paint through your stencil.

Use more than one colour to create dappled shadowy effects.

When you've applied enough paint, lift your stencil and your image should be transferred to your sketchbook.

At this stage don't forget the piece of card you cut from your stencil, as this can be used as a mask. Stick it down on your page with masking tape or spray mount.

And using paint or paintsticks as before apply colour around your mask.

Lift off and you are left with a negative image.

I also quite like the effect of the paint on the mask and think this might get stuck into my sketchbook too!

Friday, 13 August 2010

Sketchbook Project VI

I've not really done anything new today but instead have taken the wax resist idea a little further. In my box of oil pastels I found a couple of metallic crayons and tried some simplified seed head shapes.

I then brushed over these with some black ink which really makes the shapes glow and stand out from the page.

I then started to think about how I could simplify them further and draw them without lifting my pen off the page (with a view to stitching them) and came up with a couple of doodles worked on scrap paper.


I then did the same shapes, again in the metallic oil pastels, this time in my sketchbook.


And another sweep of black and blue ink.

And the scrappy little doodles... they got stuck in the sketchbook too. I think the point I'm making here is that wherever ideas occur to you... jot them down, both sketches and written notes, on whatever scraps of paper you have to hand, because they can always be added to your sketchbook later, either glued in , stapled in or tied in.

I can see this taken further with metallic threads on a dark background, so to remind me I did a quick stitched "sketch" to tie into my book.

Now it's time to work a proper stitched sample!

I'm still enjoying seeing how bloggers have taken up this sketchbook challenge. Take a look at what Miriam has done here and here. And what Penny has done here and here.
Do let me know if you are joining in so that I can link back to you!

Tuesday, 10 August 2010

Sketchbook Project V

A really quick and simple way to add interesting pages to your sketchbook is by using wax resist. You can achieve good results by just using childrens wax crayons or even a candle, but you get the best results if you use oil pastels which are oilier than regular crayons and give a better resist.

Start by sketching out your design - simple bold shapes work well and once again you are not aiming for a masterpiece!

Once you are happy with your design, load up a large soft brush with plenty of ink or watercolour and start to wash over the page.

You can see how the wax marks resist the water colour...

giving bold colourful images.


Try different designs or try putting sweeps of crayon onto the background to give different effects.


As always, give yourself permission to play!